10/24/11 NOTE: I've had a lot of people tell me to patent this. Guess what, there's no point in trying to patent innovation as a concept. If you want to know how I made it in more detail, just ask. My only request is that when asked, you tell people who told you how to make it in the first place.
------------------------
Hi everyone. As some of you may have heard, I decided that I wanted a way to access my laptop in my car, van, or the company vehicle while I am on the clock. My reasons are several.
First of all I would like access to my audio library, not only do I not always like what is on the radio, but I have a library of audio books that I like to listen to when I am out in the middle of nowhere for long periods of time.
Second, when I'm not driving, there are posts I work where movies are allowed, so having the laptop gives me that bonus as well.
Third, part of the nature of security is having to write reports, and my hand writing is bad on a good day. Add in a cramped vehicle compartment, fatigue and frustration, and I can turn out some serious chicken scratch. With my laptop, I can hammer out what I need in just a few minutes with the right forms.
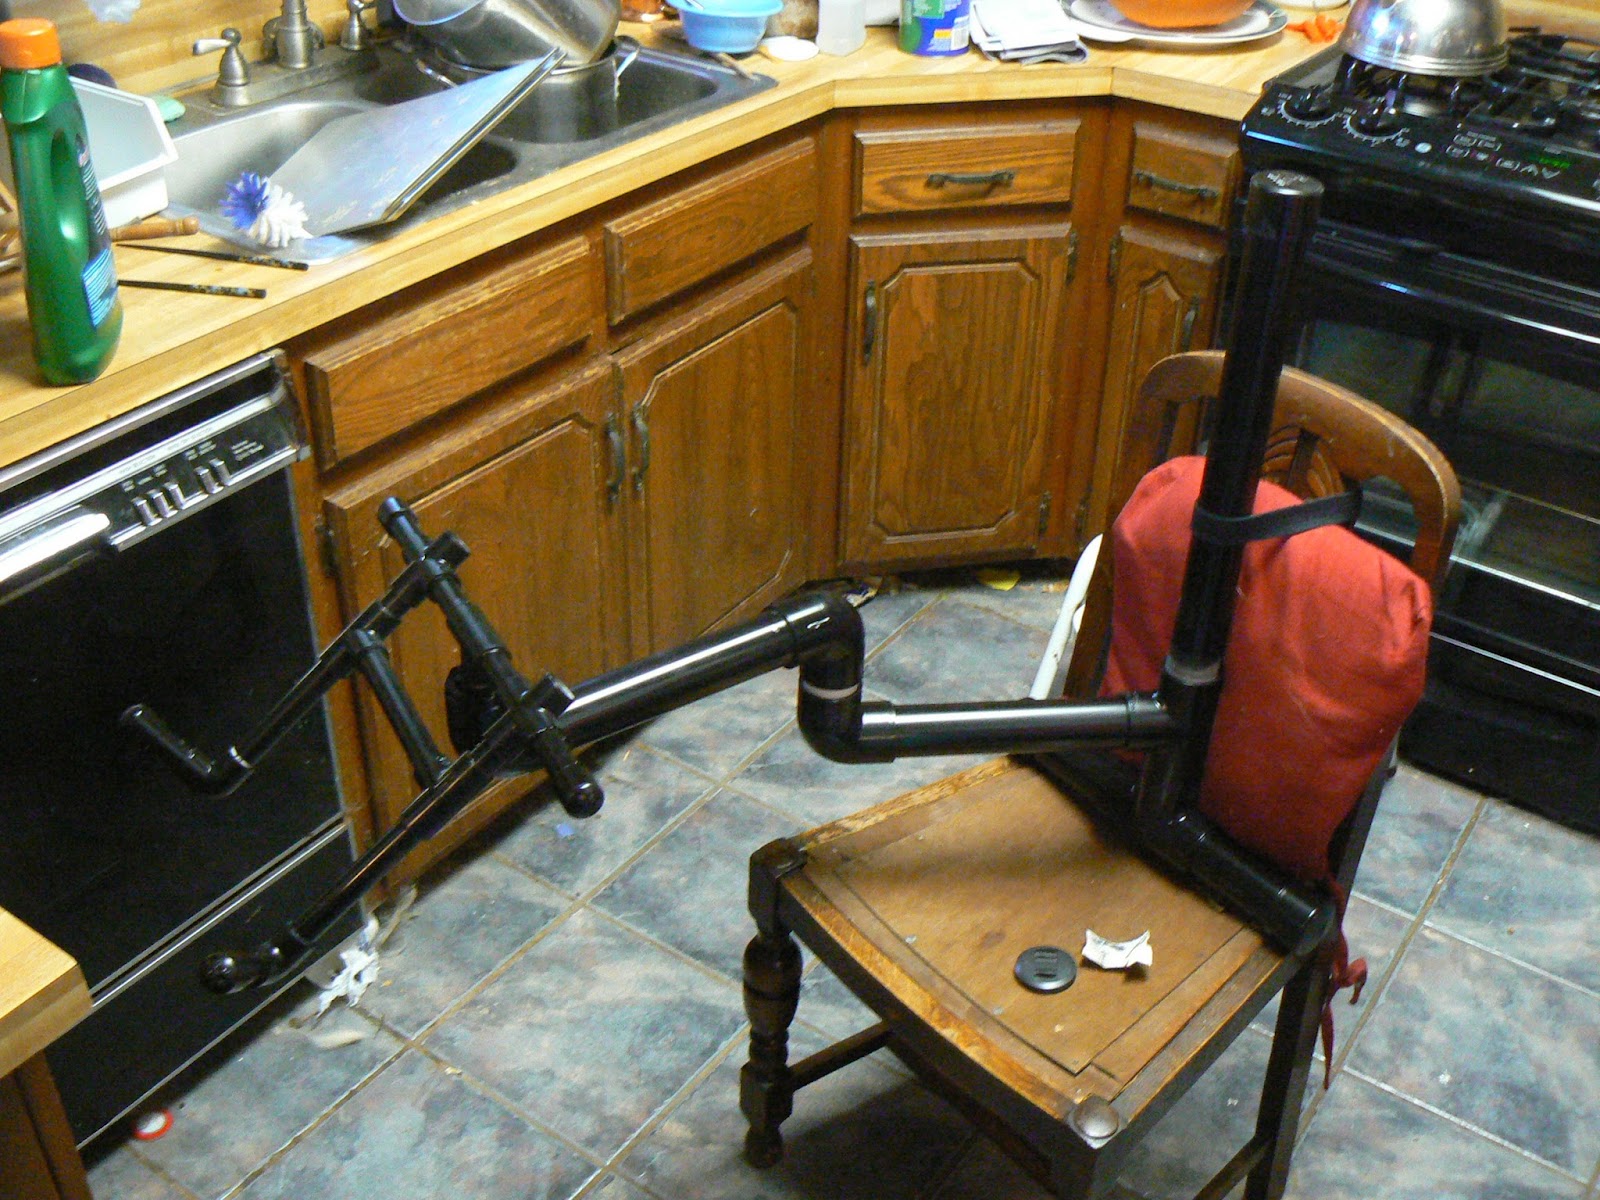
What you see below is the mock-up. I have made a few changes since then, but the overall design is the same. It sits in the passenger seat, and a strap goes around the headrest and the top of the mount. The T at the bottom gives it stability, and the jointed arm lets me move the laptop more or less wherever I want it. The good thing about this is that it is mobile between cars, and it breaks down to a small carry bag when the segments are pulled apart. The drawback is that it completely occupies the passenger seat, so a police type mount it isn't. When I have the laptop strapped in, The arm sags a little, and I almost wish I had used 2" pipe for the body, as opposed to 1 1/2", but the sag isn't a lot, so I am optimistic. I still need to get a strap for the top part to lash to the headrest, but that should be a small matter after the paint dries.
As for cost, It breaks down like this:
Most commercial models were better than $200, some as high as $500, and that includes a few temporary models that clamped down in the seat.
Parts, glue and paint all together were $39.00, and so far its taken me about 2 hours of work in my kitchen. (I would have been outside, but it got late, and cold, really fast).
The final product will be painted mat black for two reasons. One, this is going in my car, and I don't need something bright and shiny distracting me. Two, PVC breaks down in sunlight, so I need to protect it, and a few good coats of black outdoor paint will do the trick. And then of course, cool military/special forces/police/special agent type stuff is all black, so black has to be a cool color, right? I've also had a few people ask me why I don't bolt it down to the floor. That answer is simple, as I said before, I have a couple of vehicles I want to use this in (including a few I don't own), so bolting it to anything kind of defeats the purpose. Also, my car is old and getting older fast, it might well die before any part of the mount gives way.


This is meant to show how much it can fold up, letting me keep the laptop out of my way when I'm driving.

This is the mount broken down into its component parts. I included the chair in the photo for scale so you get some idea of how big this is, and isn't.

This is a close-up of the same pile. All told, its actually very simple.
---------------------------------------------------------
UPDATE: 11/18/2011
---------------------------------------------------------
Just got the painting done. It still needs 24 hours to fully dry, but I needed to get it in from the rain. Here are two shots of the semi-finished product.

-------------------------------------------------
UPDATE: 10/20/1022
-------------------------------------------------
Test run!
So, I finally strapped this thing into my wife's van so I could see how it handles. Take a look.

This is in the parking lot of a local video rental store. The laptop is pulled all the way back into the corner in this shot, like it would be if I wanted to get it out of the way, but still see what was on the screen.


And has a final note, this whole update (three photos, and all the text, were put taken, uploaded and composed from the driver's seat of this same van, just to see if it could be done. (SCORE!). I'm going to call this test drive a win for the mount, and my scatter-brained idea.
-------------------------------------------------
UPDATE: 10/24/1022
-------------------------------------------------
Okay, I just got back from three shifts at work driving the company truck around. All told, I spent 28 hours in the truck, with my mount buckled into the passenger seat next to me. I must say that I am both impressed with how well it held up, and thinking seriously about what I would change about the next one I make.
On the good side: I am very happy with the flexibility of the design, and how easy it is to move between vehicles. It gives me the access I need to use the computer, while not making me turn my head ninety-five degrees to the left to look at it sitting in the seat next to me.
On the down side, the arm wobbles a lot, so typing is a slow process. I won't be composing any books on it, but I can fill out reports, which is what I wanted. Also, It sits high enough that leaving the screen up blocks a good chuck of my field of view. I didn't know what to expect with that, so I can't complaining too much. Its not like I need to see it while driving around, though. I sanded the joints down to help it move easily, but as it turned out, that was a mistake. The joints are so smooth and light that whenever I drive, the arm wants to flop this way and that on any hard turns.
Lastly, the laptop rack itself was a good idea, but I think there are better ones. After using it for a few days now, I realize that the computer is held too steeply, and actually using the keys is harder than when it it almost flat. I have some ideas on how to change that in the next design, but that is still some time off. Also, the whole thing is too high. I really need to drop it down about five or six inches so that its at a more comfortable level for me to access.
Still, all of that is really just a lot of nit picking; the design still rocks as a first-run prototype, and I am ecstatic to have it, (even if I only get to use it for another week or so, sigh).
I swung by a local Habitat for Humanity "Restore" and picked up a second-hand athletic bag for less than a buck (major score!), and the entire rack stores in there with room to spare. I make sure not to leave it in the seat when I'm not using it, but this is fairly easy because I can throw it in the bag, and the bag in the trunk in less than a minute.
When I'm driving around, the laptop lets me access all 50 gigs of my audio library, and the speakers let me listen to it. I drive a clunker with a busted radio and bad speakers, so my laptop is as close to a stereo as I can get right now. When I stop, like when I'm on the job, or even parked somewhere for a break, I can access any unsecured wireless hot spots, including fast food joints and public libraries. This means I can get a quick check of my e-mail or stuff like that. All told, the basic convenience of not having to put the thing between me and the steering wheel is a quantum leap forward for me.
Final thought, for all of its shortcomings, the mount still well worth the $50 I spent on it.
This one definitely goes in the WIN column.